Showing posts with label Insulation. Show all posts

Friday, April 26, 2013

Almost done paneling

I'm almost done with the paneling. Yesterday I installed almost all of the remaining panels. The only ones left are the four small curved panels in the bedroom.


I also installed the panel on the front of the bed.


The cut-out is for the electrical panel, I will build a small door to cover it.

I worked on the framing for the pantry/bathroom wall also.


I still have a little more framing to do before I can put paneling up here.

The serial number plate, usually located on the hinge side of the front door frame was long gone, this is common on these old trailers. In order to get it registered I needed a new serial number plate. The serial number standard  for these year Spartans is (xx xx - xxxx) or (Length Year - Sequence Number). I was able to determine the serial number by a few things. One, I know this is a manor. Manor's are 25' in length. I was able to determine the year by a few clues like taillights, the original door handles, and the original layout. So I had the first half of the serial number (25 47 - xxxx), now I just had to find the sequence number. I finally found it in two places, one was on the street side of the tongue, C 4977 was stamped in it. The other place was on the back side of some of the cabinet drawers, 4977 was written in pencil. I assume this was to not get the drawers mixed up when building them.

So the full serial number is 25 47 - 4977. Now I just needed to make a plate. The plates vary greatly on these, some are nothing more than a small rectangle of aluminum with the number stamped on it, some are more elaborately shaped with the manufacturers name and address written on it. I believe my original one was the second kind. the shape of the original was still imprinted on the door frame so I took a small piece of plexiglass and traced the shape. Then I cut the plexiglass to shape and used it to trace the shape on a piece of aluminum. I then cut the aluminum to shape.


I was able to borrow a numeric punch die set this morning at work.


I will attach it when I get home this afternoon. It may not be all fancy like the original but at least now I can get it registered.

Sunday, April 14, 2013

Framing the Bed

To frame up the bed I first had to make and install the Birch panels on the bedroom walls.


I used the original panels as a template but for some reason they didn't line up perfectly. It doesn't matter though, the entire bottom half will be hidden by the bed and the top half will be covered with trim.

Next I built the base for the bed.


Then I built the rest of the framing. I used a 2x6 to make the curved section.


It rained the entire afternoon which made things go really slow. I still have a little bit of framing left to do on the nightstand section on the right. I will use two pieces of 3/4" plywood on top of the framing. One piece will be at the very back, the other larger piece will be hinged so it can swing up for storage access.


Saturday, April 13, 2013

Finishing up the floor

I finished the floor today. It went down pretty easily.


As you can see in the last picture the floor does not go all the way to the back. The very back is where the bed will be so there is no need to run the floor all the way back.

After finishing the floor I worked on putting up the wall panels in the back bedroom.


The reason the electrical comes out here is that the bed will run from the opposite wall to about 12" from this wall, the rest of the space will be taken up a built-in footboard/night stand. The dual voltage electrical panel will be in a hidden, recessed panel in here.

Tomorrow I will finish installing the remaining three wall panels and then frame up the bed / nightstand.

Monday, March 25, 2013

More insulation and paneling

This weekend I worked on the insulation and the furring strips in the Spartan.

I have a friend that has given me a bunch of Birch panels to use. When I went through them it turns out several of them are not birch, they look a little like Red Oak but smell very fragrant when cut like Cedar. Of course Cedar could be what the inner layers are made of.

I decided that I would install these panels on the ceiling and the Birch ones on the walls for a two-tone effect.  I experimented with several stains on both pieces and in the end we settled on just varnish for the Oak/Cedar panels and two coats of amber shellac and one coat of varnish on the Birch.

I put up the first panel in the front center of the ceiling.


Next was the panels for the curved part of the ceiling. I tried installing the panel but it would not bend.

 Here is my first attempt at bending the panel.


Needless to say this did not work, the panel straightened out once I took it out. I have since found out that you need to use hot water and towels. The hot water will soften the glue holding the plys together and allow it to keep it's shape once it dries.

In the meantime I continued installing insulation and furring strips, I'm using a lot of the original furring strips because they are in good condition, I'm making new ones for the ones that aren't.

One thing I find pretty amazing is that I am using the original 66 year old screws to hang the furring strips and panels. these are Phillips head screws with a flat tip so pre-drilling is required on the new strips I put up. I am  installing the old strips using the same holes so no drilling is needed on those. I would love to see someone try to re-use today's cheap Chinese-made screws 67 years from now! Not gonna happen!!

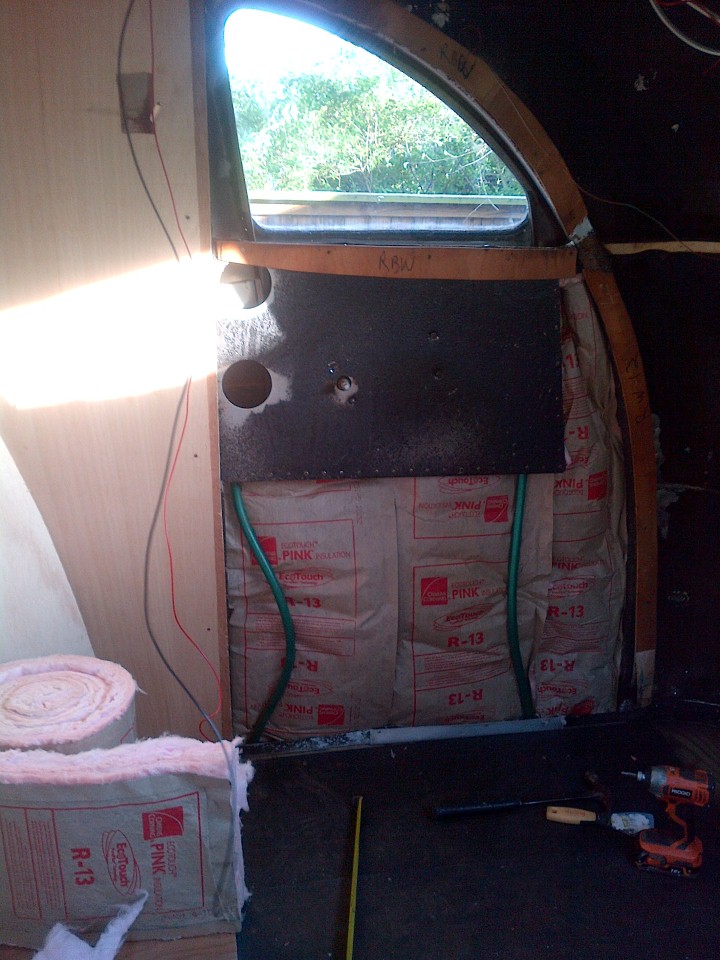
One of the challenges I had was what to do with the open areas where the pocket windows slide into. What I ended up doing was using 1/2" rigid insulation in these areas.


So after getting the first panel up I am wavering on if I want to do the two-tone thing or not. when I first came up with the idea I thought the panels might be Mahogany (it was dark in the warehouse). Now that I see that it looks like Oak I'm not too crazy about the idea. I'm not a big fan of Oak (I have some hang-up where it looks too gaudy 80's to me).

I may take it down and just use the birch. Of course this will require that I buy at least 10 new panels because the ones that my friend has are not top grade (another thing I didn't notice at first because of the dark warehouse). I can use them in areas that will be covered or partially covered but not in the open areas.

I need to make this decision very soon as I am running out of time before our first camping trip (month and a half).

Thursday, March 21, 2013

Wiring and Insulation

I spent last weekend on the wiring and insulation.

I'm running all new 14 gauge romex for the 110v and 14 gauge automotive wire for the 12v. The outlets and two kitchen florescent lights are 110v and the rest of the lighting is 12v.


The panel I will be using is the PD4560, it is a combination 110v panel and 12v panel with a built-in power inverter to power the 12v side. It will be mounted in the back in a panel next to the bed. You can see where all the wiring goes too in the picture above.

With all the wiring done I started on the insulation. I got about 1/3 of the way done. To install the insulation I first sprayed the area with rubberized undercoating and then immediately put the insulation in place. This has a two-fold benefit. First it sound-proofs the shell a little bit and second it helps to hold the insulation in place.


Hopefully I can finish the insulation this weekend and start on the new paneling!