Friday, April 12, 2013

Laying the cherry wood Floor

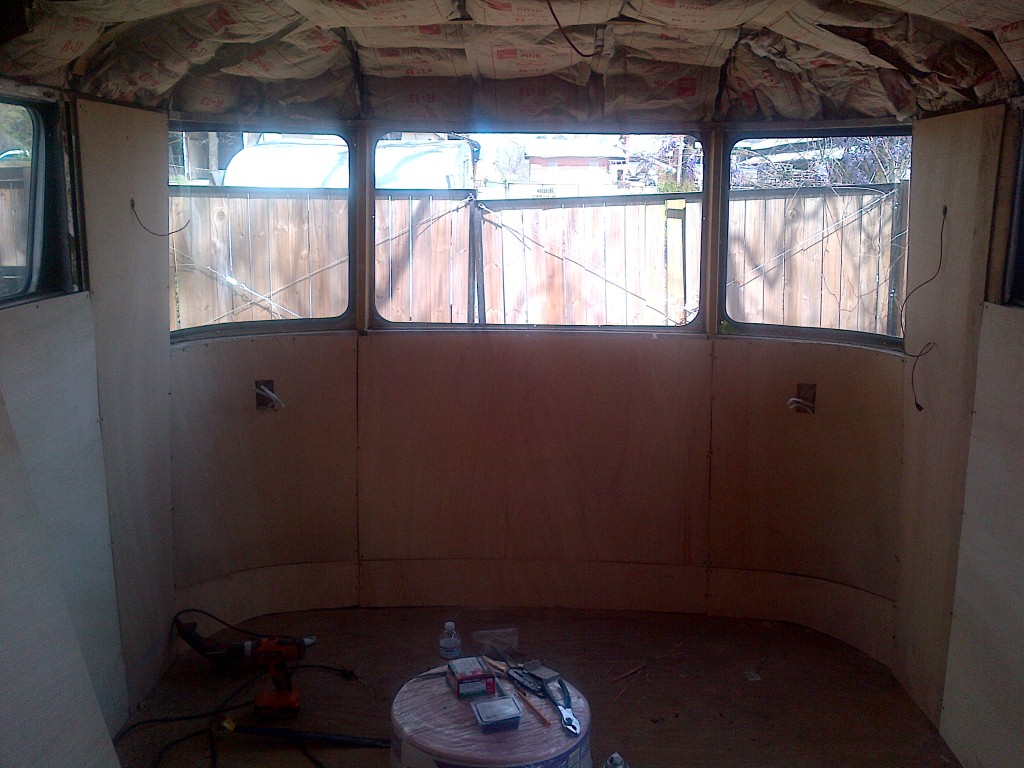
Now that I've got the walls up I've turned my attention to the floor. I will finish the ceiling afterwards. I need to get the floor down so I can get the couch and refrigerator in the camper, they have to come in through the front window opening. The door is only 24" wide but the window opening is 26" tall so I have 2 more inches to work with. Once the couch and fridge are in I can finally put the front window in and seal up the camper.

The flooring is engineered cherry that I got on closeout and was cheaper than most of the ugly laminate they had. I went to the store with the intention of buying laminate but then I saw this and realized that the weight is pretty much the same. If I remember correctly I got it for $1.19 sq ft. Cant beat that for real cherry!

First thing I did was clear the camper out completely.


Then I put down heavy weight felt paper.


I measured several points along the camper front to back to find the center and snapped chalk line along those points.

I then measured from the chalk line over to the first piece so it would be perfectly square with the camper. I'm having to scribe all the pieces that touch the front of the camper because the wall is curved.


Here is how far I got last night.


Hopefully I can finish up the floor and then finish the ceiling this weekend.

Monday, April 8, 2013

More Paneling

The paneling is progressing. This afternoon I put up three front ceiling panels and the cabinet over the observation windows.


The cabinet was a royal pain to get in!

Sunday, April 7, 2013

Paneling

I worked the entire weekend on paneling the Spartan.


In the picture above you may notice the seam running from left to right. I did this to save on panels. I had a lot of left over pieces from cutting the walls to size at 65 1/8". I will put a strip over the open area in the center but it will be covered by a couch. The side pieces will be covered by built-in tables that will be on either side of the couch.


It is very slow going, especially now that I am into the curved panels. As you can tell from the last picture above I decided to keep the cedar panel in the center, it will run all the way back.

I was able to put the curved ceiling panels in by kerf cutting them before installing them, it made it much easier. They just popped right into place and held without any fasteners which left both my hands free to drill and screw them into place.

The last thing I did before calling it a day was work on the cabinet that goes above the the front windows.

The original was in really bad shape, so I used the original bottom and front as a template for the new one.


I actually completed it but did not get a picture of it before it got dark. Next I will hang it and the last three pieces in the front and then move on to the back of the camper.

Monday, March 25, 2013

More insulation and paneling

This weekend I worked on the insulation and the furring strips in the Spartan.

I have a friend that has given me a bunch of Birch panels to use. When I went through them it turns out several of them are not birch, they look a little like Red Oak but smell very fragrant when cut like Cedar. Of course Cedar could be what the inner layers are made of.

I decided that I would install these panels on the ceiling and the Birch ones on the walls for a two-tone effect.  I experimented with several stains on both pieces and in the end we settled on just varnish for the Oak/Cedar panels and two coats of amber shellac and one coat of varnish on the Birch.

I put up the first panel in the front center of the ceiling.


Next was the panels for the curved part of the ceiling. I tried installing the panel but it would not bend.

 Here is my first attempt at bending the panel.


Needless to say this did not work, the panel straightened out once I took it out. I have since found out that you need to use hot water and towels. The hot water will soften the glue holding the plys together and allow it to keep it's shape once it dries.

In the meantime I continued installing insulation and furring strips, I'm using a lot of the original furring strips because they are in good condition, I'm making new ones for the ones that aren't.

One thing I find pretty amazing is that I am using the original 66 year old screws to hang the furring strips and panels. these are Phillips head screws with a flat tip so pre-drilling is required on the new strips I put up. I am  installing the old strips using the same holes so no drilling is needed on those. I would love to see someone try to re-use today's cheap Chinese-made screws 67 years from now! Not gonna happen!!

One of the challenges I had was what to do with the open areas where the pocket windows slide into. What I ended up doing was using 1/2" rigid insulation in these areas.


So after getting the first panel up I am wavering on if I want to do the two-tone thing or not. when I first came up with the idea I thought the panels might be Mahogany (it was dark in the warehouse). Now that I see that it looks like Oak I'm not too crazy about the idea. I'm not a big fan of Oak (I have some hang-up where it looks too gaudy 80's to me).

I may take it down and just use the birch. Of course this will require that I buy at least 10 new panels because the ones that my friend has are not top grade (another thing I didn't notice at first because of the dark warehouse). I can use them in areas that will be covered or partially covered but not in the open areas.

I need to make this decision very soon as I am running out of time before our first camping trip (month and a half).

Thursday, March 21, 2013

Wiring and Insulation

I spent last weekend on the wiring and insulation.

I'm running all new 14 gauge romex for the 110v and 14 gauge automotive wire for the 12v. The outlets and two kitchen florescent lights are 110v and the rest of the lighting is 12v.


The panel I will be using is the PD4560, it is a combination 110v panel and 12v panel with a built-in power inverter to power the 12v side. It will be mounted in the back in a panel next to the bed. You can see where all the wiring goes too in the picture above.

With all the wiring done I started on the insulation. I got about 1/3 of the way done. To install the insulation I first sprayed the area with rubberized undercoating and then immediately put the insulation in place. This has a two-fold benefit. First it sound-proofs the shell a little bit and second it helps to hold the insulation in place.


Hopefully I can finish the insulation this weekend and start on the new paneling!

Sunday, February 10, 2013

Repairing the drip rail and new rims

At some point some genius cut out a small section of drip rail in front of and behind the rear door. The reason for this appears to have been for some type of wooden porch. It looks like they cut it away to get the porch flush with the side of the camper.


Whatever the reason it ended up royally screwing up the camper. water poured down from the hole in the drip rail directly on to the door hinge and seam, from there it went directly in to the camper. Its no wonder the floor was completely gone in this area.

The optimal thing to do would be to remove the complete section of affected drip rail and replace it with a new one. Since I am not made of money I decided to put in a patch at both spots.


I cut two small pieces of aluminum and bent them into shape, drilled the rivets out of the affected area, and hammered the patches into place. I used butyl tape on the seams. Now they dont leak at all.

The other thing I did was to find a set of aluminum rims to replace the steel ones that came on the camper. The rims are 15x7 with a bolt pattern of 5x5.5. The steel rims were rusted to the point that it was started to affect the structural integrity.

The rims I found are Amreican Racing rims. they were $100 for a set of four in Craigslist. That leaves another set of two for another camper!


I think I'm close to sealing all the leaks...

Saturday, February 2, 2013

Window Screens Pt 1

Yesterday I began working on the window screens. The screws that hold them in place are completely rusted and have stained the aluminum.


First I removed the screen frame from the trailer.


Then I took it apart. The frame is nothing more than some flat pieces of aluminum screwed to a tubular piece of aluminum. The screen is sandwiched in between them.


I took the flat pieces and sanded them with 220 grit sandpaper, then 800 grit, then some #1 steel wool. Then I cut out a new piece of aluminum screen and put everything back together.


I discovered a Fastenal store not far from my house and I love it! They have every nut, bolt, or screw you could ever need.

I bought 150 #4x1/4" stainless pan head sheet metal screws for less than $5.


These are the screws I used in the picture of the completed screen above. Being stainless they will never rust like the original ones did.

I then installed the screen on the camper. Here is a quick before & after.

Before
 
After
 
Now I need to get the rest of the camper polished so the screens dont look so out of place!